Frame First
Since building the MGEX Strike Freedom I’ve loved the idea of building a complete frame before attaching armor. After the headache if removing parts from my Sazabi Ver.Ka to top coat them I had already decided that I would stop short of installing any parts which I’ll need to top coat so that I don’t risk breakage later. With the NG Full Mechanics I was delighted to find that the instructions have you completing the frame first anyway.
I did decide to give the Gundam marker a proper go for panel lining and actually lined many of the white pieces while still attached to the runners. I’m not unhappy, specifically because this kit’s line definition is very shallow and therefore would not have lent itself to panel lining with the Vallejo mecha wash I’ve been using.
I’ve been contemplating painting the frame black before I move on to top coating and installing the armor panels, I’ll think more on that tomorrow. Full frame took about 2.5 hours and I knocked it out during the first build session. People have been warning me about this kit not aging well and saying it’s like a bloody big high grade, but I disagree. This full mechanics feels as though it shares a bit more DNA with a simple MG than with the lower-end HG counterparts. This is thanks partially to the fully built inner frame, and partially to the full mechanics detail gimmicks. The way the detail bits move and articulate together is obviously less functional than similar MG detailing, but dealing with three to four parts for what may otherwise have been just one larger piece on and HG. That said, I’ve only built the inner frame yet so my feelings could change when I get further into the build. I’m thinking about getting some silver paints and hitting the wire/metal tube areas on the arms and legs.


First time painting
Thanks to a leftover can of gold spray paint in the garage I’ve decided to go ahead and try my hand at painting a bit. So I’ve hit the black claws and all of the yellow plastic parts. I didn’t prime them, so the results are inconsistent. I’m weighting going back and priming the yellow pieces black and starting again. I’ll let you know if I decide to do that.


Chugging ahead
I’ve decided against stripping down and priming the yellow pieces black. I’ll know better for next time, but if the community is even half right about how this kit ages then it’s not worth the spending the extra time. I’ve moved on to top coating the white armor and starting the assembly.
It’s a lot harder to keep track of build time when I’m stopping to top coat and waiting for for the enamel to dry in between sessions. I don’t like this process quite as much as a straight snap build before adding any details or top coat, but breaking a piece on the Sazabi Ver.Ka during tear down scared me. I’ll have to get over that.


Matt or Glossy?
I think I’ve decided that I’m not a fan of glossy top coat unless there’s a paint job that really leans into the metallic colors. I’m too deep now, if I really hate it, maybe I’ll matt top coat the whole model aside from the gold bits when I’m done. The glossy coat seems to have a real problem making the Gundam marker panel lines run and swirl. It’s not terrible, but it’s pretty noticable in some areas.
More painting
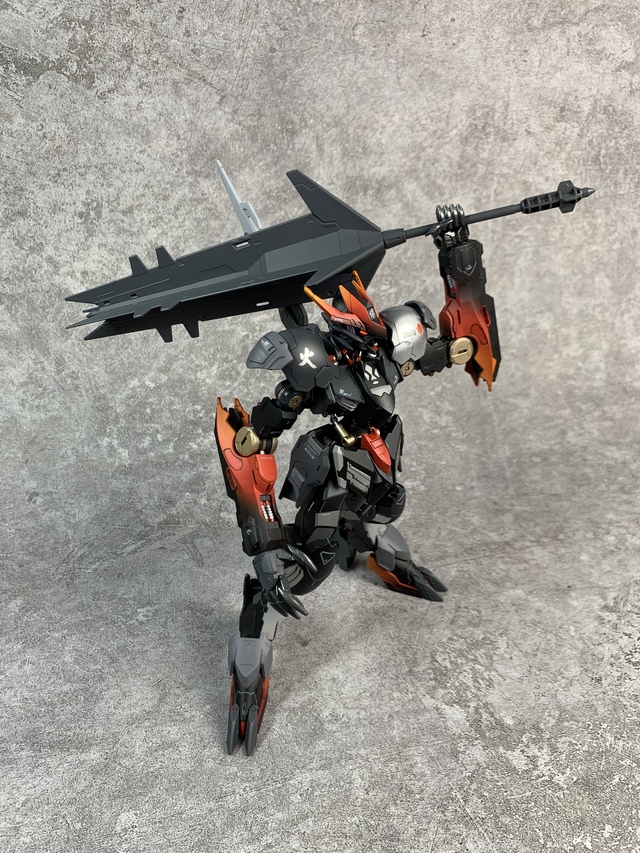
I decided the ultra-large mace didn’t pop, and as much of a headache as I had with the the gloss top coat I knew I wasn’t going to use that. I ended up using a matt black primer/paint and wow, am I happy with the results.
Final thoughts
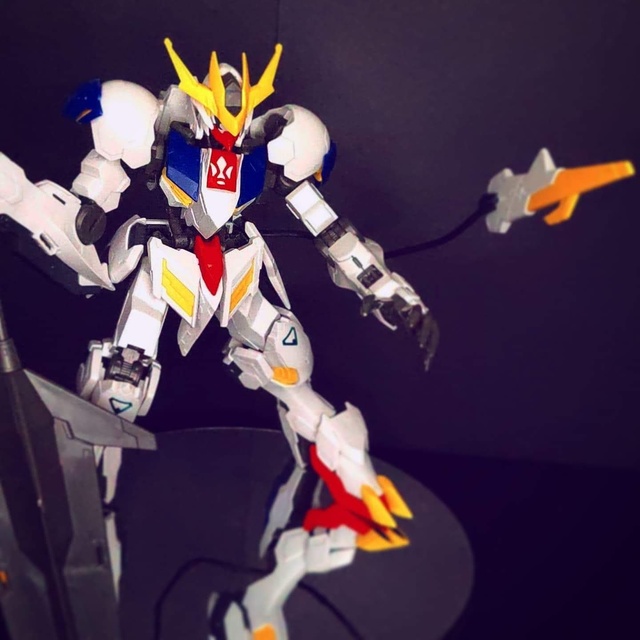
All in all, I do see why people compare this kit to an HG, but I’m pleased with the amount of detail. I am not thrilled, however, with how poseable this finished model is. The bulky forearms stay thick all the way down to the wrist inhibiting a lot of hand motion, and the odd way the thighs crowd the front skirt area make a lot leg poses awkward. The finished kit looks great, even with my top coat faux pas, and for that I am really happy. It was an easy, relaxing build.
Now enjoy the photos