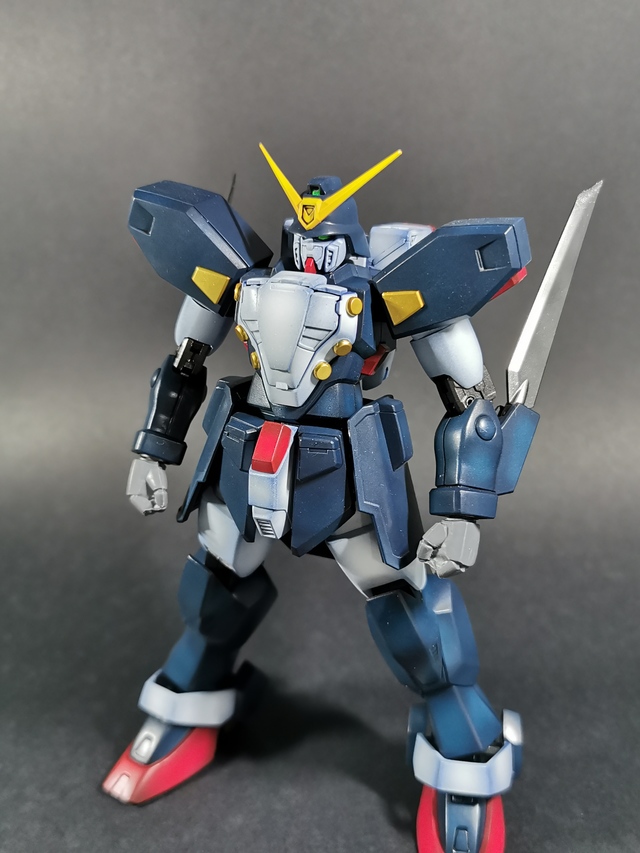
This kit was a project that I worked on for my friend that recently got into gunpla. He said he wanted a Zaku with a white and gray colour scheme.
Before
Here is a photo of the kit before. No seams removed yet.
What a big boy…

Removing Seams and Modification
Just the usual seamline removal. There arent a lot of major seams on this kit, just on the front of the legs and feet, and the usual seamline on the shoulder pauldron.

Something that I was nervous about doing with this kid was the removal of the seamline on the front of the foot. The foot is built around the ankle joint, meaning I would have had to either remove the seam while the joint was in the foot, or, what I ended up doing, cutting the bottom of the foot allowing for the ankle joing to be placed in from the bottom.
Thankfully ZakuAurelius’ WIP series on his MegaSize Zaku 2 helped me through the process.

Painting Progress


Thats a lot of masking tape.

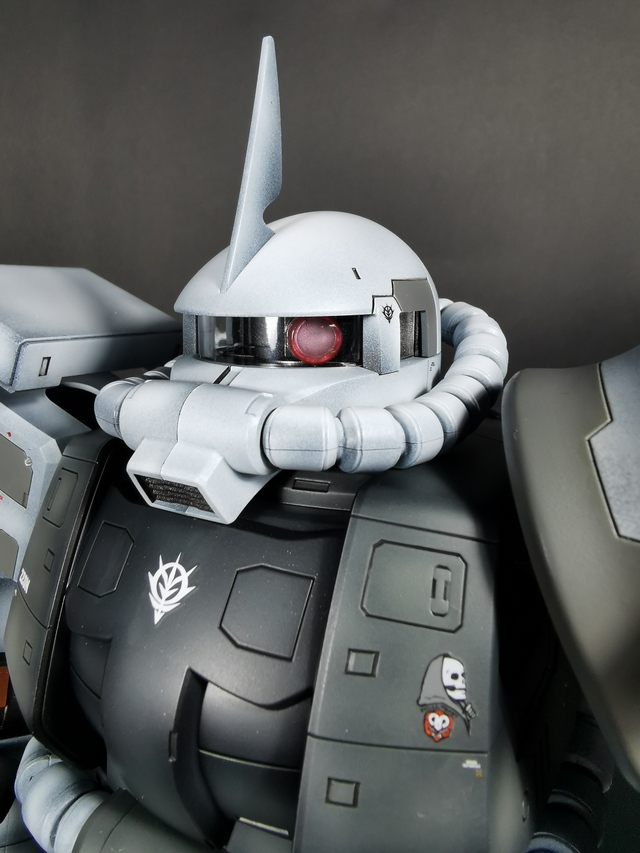
Final Photos
The kit is just so BIG and I struggled to get the kit to fit into the frame of my paper backdrop. Overall it turned out a lot better than I thought it would.
For the decals I used a lot of HIQ’s caution decals aswell as some of Bandai’s multiuse zeon decals, and I took the left over reaper logos from the MG Crossbone Full Cloth I did earlier this year.


Paint Used
- White - GaiaNotes EX-1 White
- Center Chest Gray - Mr. Color Extra Dark Sea Gray
- Outer Chest Gray - Mr. Color Gray FS
- Two Tone Gray - GaiaNotes Neutral Gray 3
- Frame - GaiaNotes Star Bright Iron
- Frame Accents - Tamiya Copper
- Thrusters - GaiaNotes Star Bright Silver