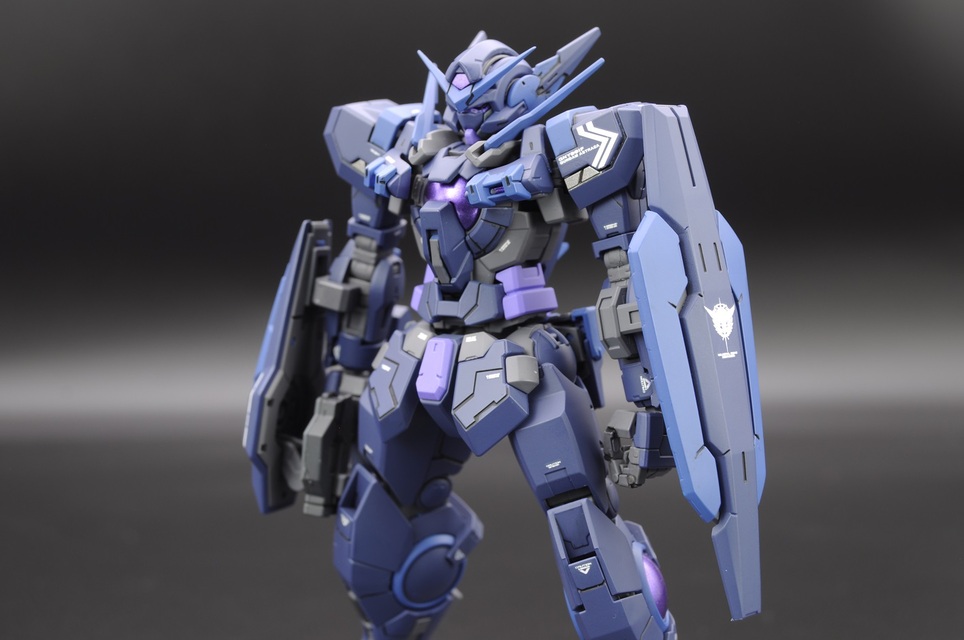
MG Unicorn Gundam (ver. Wildberry)
luperpla on Mar 13, 2022

Base Kit
MG RX-0 Unicorn Gundam (OVA Ver.)

This kit was built while participating in GoodguyDan’s “Shelf Queen” group build. I had started this kit back in 2013 and stopped due to burnout, because I had just built 3 or four other Unicorn kits and just could not build another one at the time. When Dan and company came up with the idea to do a group build that had the purpose of getting the oldest kit in our backlogs out, I was ecstatic to realize this kit was the one I’d be building. I hadn’t built and painted a Unicorn since I returned to the hobby in 2020 and choose to add parts from my second oldest kit in my backlog, an MG Banshee (OVA version) to make this a “Perfectibility lite” style Unicorn, without the Armed Armor DE/XC.
With that, decided I dug the kit out of its box and got to work. I already assembled the inner frame for the kit and attached some of the psychoframe to it and even painted the regular frame and blue parts like the feet and backpack! I wasn’t too thrilled about the thought of painting this kit in “standard” Unicorn colors though….so I looked for inspiration on my shelf and decided that it was the perfect time to try painting the psychoframe on a Unicorn kit.


Before I could get to that though, I had to finish cutting out and sanding all of the armor and remaining psychoframe parts! That took a week or two- I really underestimated how complicated this model is to accommodate the transformation from Unicorn to Destroy mode. I’d also lost a good number of parts somehow and wound up having to do stuff like take bits from my In-Dire-Need-Of-Replacement-Parts MG Banshee Norn and order new parts from mechapartsguy. Lost parts happen pretty often when building MG kits and when it’s a kit that was started as long ago as this one was, I wasn’t surprised to see that I had lost a lot more than usual. It didn’t wind up impeding my progress very much and before long it was time to paint this thing.
One of my favorite builds that I’ve done is my MG RX-78-2 in Wildberry colors (Purple/Sky Blue) and considering the Unicorn is a successor to the suit (lineage wise, you know?), I thought they’d look grey together with the Unicorn having purple on the V-fin, feet and backpack with a sky blue psychoframe. I decided to spice up the all-white nature of the MG kit with some grey stings inspired by the color distribution from from RG kit and used my usual shading routines, adding a little white to the sky blue for the psychoframe to give it some additional depth.


Due to the increased friction between the parts cause by painting so much of the frame, I had to build this kit in Destroy mode and am totally unable to transform it in to Unicorn mode without wrecking the paint on the psychoframe. Even assembling it caused scratches on some parts due to the already minimal clearance being removed by paint layers. I wound up having to fix a handful of sections via masking on the fully assembled kit, because trying to take it back apart definitely carried a severe risk of further damaging the paint.


With all those issues resolved, and the painting complete, it was time to move on to my favorite stage of any “ver. Ka” style build: Decal Hell! I had Bandai’s Gundam Decal vol. 44 at my disposal that were specific to the MG Unicorn ver. Ka along with a manual from the same kit to use as a reference but I was missing two critical decals for the Unicorn: the ones that go on the inside of the chest vents! To remedy this, I bought the SIMP models E36 Gundam Unicorn decals that were meant for the MGEX Unicorn and also dug out my two decal sheets from my old MG Nu Gundam ver. Ka to give me some flexibility/uniqueness to the build. The SIMP decals were really difficult to use because they don’t seem to be “movable” for very long, but an abundance of Mr. Mark Setter gave me the time I needed to move the decals in to the correct positions. I wound up using the standard ver. Ka decals for most of the build but I had to get creative when it came to decals with grey text that went on parts painted grey and that’s where the Nu ver. Ka decals came in really handy. I also got to do the decals for the Armed Armor VN/BS without a guide and had a lot of fun putting those where ever I thought they’d go best.


The final build was flat coated with Mr. Color’s Super Smooth Flat, which continues to be an outstanding topcoat to use for builds. While I had a couple struggles with the kit due to how fussy a transforming model can be, I really adore how clean this model looks when completed. It might be a kit from 2007 at it’s core, but it’s a model that wonderfully represents the Unicorn Gundam.
Paints used:
- Internal frame painted with GaiaNotes NAZCA mechanical surfacer Heavy + Super Heavy
- Armor and psychoframe parts primed with GaiaNotes NAZCA mechanical surfacer Light
- Psychoframe parts painted with Mr. Color C-34 Sky Blue
- Feet, V-Fin and backpack painted with GaiaNotes 017 Purple Violet
- Main armor painted with GaiaNotes NC-001 Steel White
- Grey armor parts painted with GaiaNotes 073 Neutral Grey III
- Thruster bell exterior painted with GaiaNotes 010 Bright Gold, interior with Mr. Metallic Color GX 207 GX Metal Violet, attachment point painted with Mr. Metallic Color GX 202 GX Metal Red
- Edge of the shield painted with GaiaNotes 010 Bright Gold


